
How to Use Silver Leaf with Oil Size
Traditional oil-based gilding method using oil size adhesive
Step-by-step silver leaf application tutorial
This tutorial introduces the fundamentals of applying genuine silver leaf using oil-based adhesive size. Learn about the different types of oil sizes available, how to properly test for the correct tack, and how drying times influence adhesion and working time.
Clear application guidance covers leaf handling, placement, overlap control, surface cleanup, and light burnishing techniques to produce a smooth, even metallic finish. Ideal for decorative objects, frames, furniture, architectural elements, and interior applications where durability and control are essential.
Quick-Dry Oil Size will reach tack in approx. 45 minutes and will remain open for gilding for 2 to 3 hours. In very dry and warm environments, it may reach tack in as little as 30 minutes and the open time for gilding may be greatly reduced. It produces excellent results with genuine and metal leaf and is recommended for small projects or when time is limited. Allow to cure for 24 hours before sealing. Download complete specification sheet for this product.
Slow-Set Oil Size is recommended for projects that may require a longer open time for gilding than Quick-Dry will allow. It will reach proper gilding tack in 10-12 hours and will remain open for gilding with genuine or metal leaf for an equal amount of time. The open time for gilding with metal leaf is usually less, as it is with other oil sizes. Allow to cure minimum of one week before sealing.
Oil Gilding Video Tutorial
Quick Dry oil size gilding. This detailed demonstration shows you how to apply genuine gold, Silver, imitation gold, aluminum and copper leaf to objects and furniture using the classic 3 hour oil size method. Brought to you by the folks at gildedplanet.com, you'll learn about types of adhesive, testing for 'tack' and drying rates, easy leaf application tips and cleaning and burnishing the leaf.
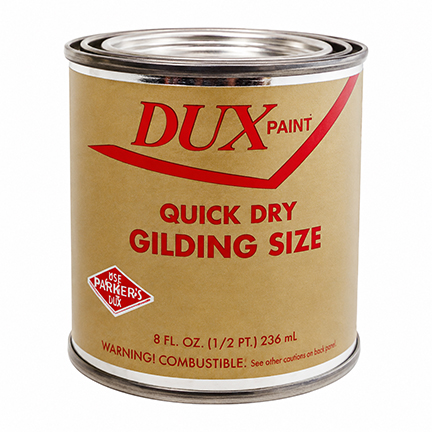
Dux Quick Dry Oil Size
Dux Quick-Dry Size produces excellent results with genuine and metal leaf and is recommended for small projects or when time is limited. More about Dux Quick set and Slow Set oil size.
| DQ/8
$ 20.50 Dux - Quick Dry oil size. 8 oz. 1/2 Pint |
Oil Size | |
| DQ/P
$ 29.50 Dux - Quick Dry oil size. 16 oz - Pint |
Oil Size | |
| DQ/Q
$ 56.00 Dux - Quick Dry oil size. 32 oz. - Quart |
Oil Size | |
| DQ/Gal
$ 182.00 Dux - Quick Dry oil size. Gallon |
Oil Size |
Step-by-step tutorial starts here
Step 1: Prepare work area. Cover working surfaces and floor areas with drop cloths or newspaper. Use low-tack painters tape to mask any areas not to be gilded. Lightly sand the surface if necessary with 220 grit sandpaper to remove any blemishes.
Step 2: Prime surface. Remove sanding dust with a tack cloth and apply a quality primer like Burnish Sealer. This primer-sealer has been specially formulated for gilding processes and is available in 3 color tones - Red, Grey and Ochre. For Genuine Silver and White metals we recommend the Gray Burnish Sealer. Burnish Sealer produces a high quality, smooth surface for gilding. Ochre, red or grey can produce fault hiding bases or color enhancing undertones.
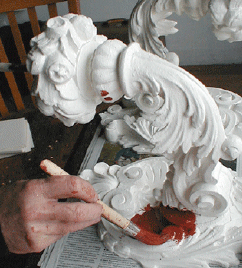
Step 3: Apply base color, also referred to as 'bole'. Our one-step 'burnish/sealer' is an oil based product that acts as both a primer and undercolor. When using the Burnish Sealer it is generally not necessary to apply an additional paint color over the primer sealer. This product is available in 3 colors. One can experiment with different colors and your choice will affect the overall appearance of the finished product. Visit the Gilded Planet Bole color center for more color ideas.
About 'Bole': Traditionally, bole was made from clay. Today paint is typically substituted. You can learn more about true clay bole here.
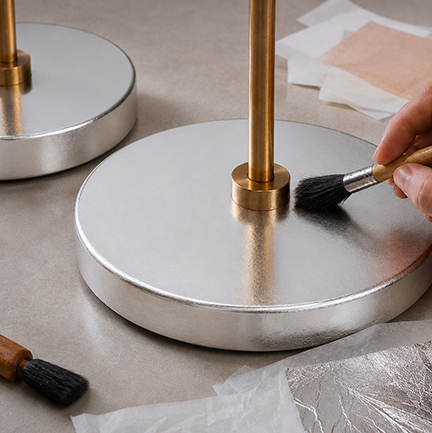
Step 4: Apply adhesive 'size'. Size refers to the adhesive used to adhere the leaf to a surface. For most common gilding practices there is a choice of sizing available, water-based or oil-based. Apply carefully and evenly, working the size to an even film as much as possible. Visit the Size and adhesive center for detailed use and product information, including drying and tack times.

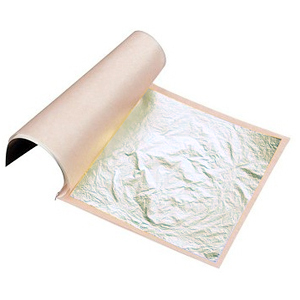
Manetti Silver Leaf Packs - 500 leaves
Manetti Brand - Italian Leaf Pack of 20 Books. - 500 leaves. Each leaf is 3 3/8" x 3 3/8" square. Approx. coverage is 39 sqft. Gram weight per 1000 leaves vary. See below.
| MA00.00SV
Manetti Brand - Genuine Silver Leaf - 28 gram |
Loose Leaf | |
| MA00.00SP Manetti Brand - Genuine Silver Leaf - 21 gram |
Patent Leaf |