How to prepare Gesso for Traditional Water Gilding

Mastering Gesso Preparation for Traditional Water Gilding and Icon Fabrication

For traditional water gilding and icon fabrication, true gesso is made by mixing 'Whiting' powder with animal hide glue and water. Follow this recipe to achieve the ideal consistency and create a flawless foundation for your gilding projects.

Purchase gesso powder.

Purchase gesso stipple brushes.

Hide glue for Traditional Water Gilding

Selecting Your Glue

True gesso is created by mixing 'Whiting' powder with animal hide glue and water. We offer both Hide Glue and Rabbit Skin Glue, each suited to different project requirements. Let's start with the basics:

Hide Glue

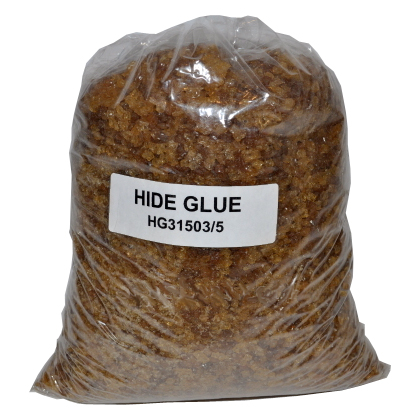
Hide Glue is produced from various animal skins. It is light in color, has high cohesion, and is odorless. This glue is highly refined, consistent, and formed into small cubes. With a bloom strength of 240, Hide Glue is highly recommended for making gilder’s gesso.

Rabbit Skin Glue

Rabbit Skin Glue is primarily made from shaved rabbit skins and is known for its extremely high cohesion properties, distinctive color, and odor. Like Hide Glue, it is highly refined, consistent, and formed into small cubes. Rabbit Skin Glue has a Bloom strength of 400, making it significantly stronger than Hide Glue, and it is recommended for mixing with gilder’s clay to create gilder’s bole.

Bloom Strength Comparison

Glues recommended for water gilding can be compared by evaluating their gel strength, defined by the Bloom Gelometer, which measures the glue's rigidity. The Bloom unit reflects the force required to create a 4mm depression on the surface of a prepared sample. Higher Bloom units indicate a more rigid and stronger glue, while lower Bloom units suggest a more flexible and weaker glue.


Preparation of Gesso

Hide glue for Traditional Water Gilding
Creating the gesso

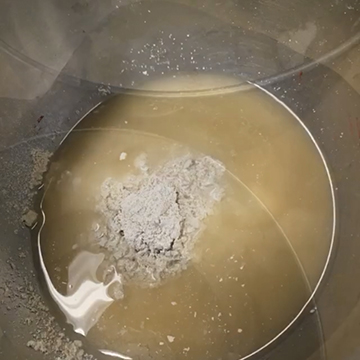
Once the glue has reached the correct strength, heat it again until it is as hot as possible without boiling. Gradually add the heated glue into a pot containing whiting or chalk, adjusting the amount based on your project size—starting with one cup is typical. Slowly mix in the hot glue, stirring thoroughly until you achieve a smooth, paste-like consistency. The gesso should have the texture of light cream. For extra smoothness, strain the mixture through cheesecloth, squeezing it to break up any clumps and remove coarse particles.


Testing the Gesso

To quickly test your gesso, apply a layer of the hot mixture to a piece of wood or Masonite using a brush. Allow it to dry completely, using a hairdryer to speed up the process if needed. Once dry, lightly sand the surface with 320-grit sandpaper. If the sandpaper clogs quickly and the gesso is easily removed, the mixture is too thin. If the gesso is too hard and shows obvious scratch marks, it’s too thick. Adjust by returning the mixture to the double boiler and adding more glue or whiting as needed.

Gesso and gilder’s glue recipes can vary, and finding the perfect formula may require some experimentation. Temperature, humidity, and seasonal changes can affect glue performance, so adjustments may be necessary. Gilders often tweak the glue-to-water ratio, modify the temperature and dissolving time, or mix Hide and Rabbit Skin glues to achieve the ideal consistency for creating a superior gesso for water gilding or fine art applications.

Adding Pigment

To create a variety of color options, you can add dry pigment to the gesso. Use finely ground pigments, and mix them into the whiting before gradually stirring in the hot glue mixture. Keep in mind that adding pigment can affect the hardness of the gesso, so some experimentation may be needed to achieve the desired results.


Storing your gesso

Gesso has a limited shelf life and can begin to mold over time. To extend its usability, store any unused gesso or glue in a glass container in a cool, dark place. When you're ready to use it again, reheat it in a double boiler to restore the smooth, workable consistency. If you notice mold or a moldy smell, it's best to discard the batch and prepare a fresh one.